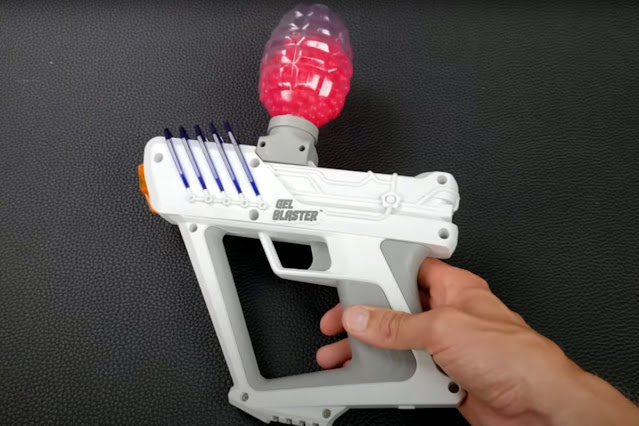
How To Clean A Gel Blaster? A step-by-step guide
Greetings, fellow gel blaster aficionados! After choosing a gel blaster, if there's one thing every responsible gel blaster player should know, it's the art of cleaning and maintaining your beloved gel blaster. Just like any precision instrument, a clean gel blaster is a high-performing gun. So, join me as we embark on a journey to master the essential steps of cleaning a gel blaster with utmost care and attention.
Step 1: Safety First
Before we dive into the cleaning process, always ensure that your gel blaster is unloaded and the battery (if electric-powered) is disconnected. Your safety should never be compromised during any maintenance activity.
Step 2: Disassemble with Care
Gel blasters can be a bit intricate, so handle the disassembly process carefully. Consult your gel blaster's user manual or online resources for guidance. Generally, you'll need to remove the magazine, battery, and any attachments before proceeding.
Step 3: Cleaning the Exterior
The first step in our cleaning quest is to tackle the exterior of your gel blaster. Use a soft cloth slightly dampened with water or a mild cleaning solution to wipe away any dirt, dust, or grime. Be gentle and avoid using abrasive materials that may scratch the surface or damage any attachments.
Step 4: Cleaning the Barrel
The gel blaster barrel is a critical component affecting accuracy and performance. To clean it, you'll need a cleaning rod, a cleaning swab, and a barrel cleaning solution specifically designed for gel blasters.
- Attach the cleaning swab to the cleaning rod.
- Apply a few drops of the cleaning solution to the swab.
- Gently insert the rod through the barrel and push the swab back and forth to remove any residue or debris.
- Repeat the process with a dry swab to ensure the barrel is clean and dry.
Step 5: Gearbox and Internal Components
If you have an electric-powered gel blaster, the gearbox and internal components require attention to maintain smooth functioning. Be cautious when opening the gearbox, as it contains small parts and gears that can be easily lost or damaged.
- Use a soft brush or compressed air to remove dust and debris from the gearbox and surrounding areas.
- If you notice excessive dirt or grime, consider disassembling the gearbox for a more thorough cleaning. However, if you're not confident in doing so, it's best to seek professional assistance or consult online tutorials.
Step 6: Cylinder and Hop-Up Cleaning
The cylinder and hop-up are other essential components that play a role in gel blaster performance.
- Use a cotton swab or soft cloth to clean the cylinder and hop-up unit.
- Be cautious not to scratch or damage any parts during the cleaning process.
Step 7: Magazine Maintenance
Keeping your magazine clean ensures smooth feeding and minimizes jamming issues during gameplay.
- Disassemble the magazine as per the user manual instructions.
- Wipe the exterior with a damp cloth.
- Use a soft brush or compressed air to remove any dirt or debris inside the magazine.
- Check the magazine's O-rings for signs of wear or damage. Replace if necessary.
Step 8: Battery Care (for Electric-Powered Blasters)
If your gel blaster is electric-powered, proper battery care is essential for optimal performance.
- Use a soft, dry cloth to wipe the battery and contacts clean.
- Avoid overcharging the battery, as it may damage both the battery and the gel blaster. This is vital as excessive charging once caused a malfunction in my Surge XL gun.
Step 9: Lubrication
Proper lubrication is crucial to maintain the smooth functioning of your gel blaster's moving parts.
- Use a gel blaster-specific silicone lubricant and apply it sparingly to the gearbox gears and other moving components.
- Avoid using too much lubricant, as it may attract dust and debris.
Step 10: Reassembly and Function Test
After cleaning and lubricating all the components, reassemble your gel blaster carefully.
- Double-check that all parts are correctly aligned and attached.
- Perform a function test by dry firing the gel blaster a few times to ensure everything is working smoothly.
Step 11: Regular Maintenance Schedule
Congratulations! You've successfully mastered the art of cleaning your gel blaster. But remember, maintenance is an ongoing process. To keep your gel blaster in top-notch condition, establish a regular maintenance schedule. Depending on your usage, cleaning and lubricating every few weeks or after several games should suffice.
Also Read: How to fix a gel blaster?
Conclusion
Cleaning a gel blaster may seem daunting at first, but with the right guidance and a touch of patience, it becomes a breeze. Taking care of your gel blaster not only ensures peak performance but also extends its lifespan. By following these steps diligently and making regular maintenance a habit, you'll be able to fully immerse yourself in the thrilling world of gel blaster battles with confidence and finesse. So, arm yourself with knowledge and a well-maintained gel blaster, and let the gel balls fly!


Comments
Post a Comment